앱 업데이트를 할 때 각 스토어의 심사를 받아야 하기 때문에 최소 하루 이상 시간이 소요된다. Microsoft에서 서비스하고 있는 Code Push를 사용하면 스토어의 심사를 받지 않고 빠르게 앱을 업데이트할 수 있다. 하지만 일부 기능이 추가되어 빌드를 해야 하는 경우를 제외한다. 간단하게 javascript 나 스타일같이 간단한 수정을 했을 때 바로 적용할 수 있다.
setUp
1
2
3
4
| sudo npm install -g code-push-cli //code-push-cli을 설치
npm install -g appcenter-cli
npm install --save react-native-code-push
npx react-native link react-native-code-push
|
- codepush에 앱을 등록하기 위해 아래 명령어를 실행하고 Visual Studio App Center에 로그인한다.
- 로그인 후 발급된 인증 토큰을 복사한 뒤 터미널에 붙여넣기한다.
- Android와 iOS 서비스를 등록한다.
1
2
| code-push app add <myAppName-android> android react-native
code-push app add <myAppName-ios> ios react-native
|
- 서비스 등록이 완료되면 Deployment Production Key 와 Staging Key 확인할 수 있다. Deployment Key 확인하려면 아래 명령어를 실행한다.
1
2
| code-push deployment ls <myAppName-android> -k
code-push deployment ls <myAppName-ios> -k
|
ios 설정
1
| npm install appcenter appcenter-analytics appcenter-crashes --save-exact
|
ios/AppCenter-Comfig.plist 파일에 아래 소스를 추가한다.
1
2
3
4
5
6
7
8
| <?xml version="1.0" encoding="UTF-8"?>
<!DOCTYPE plist PUBLIC "-//Apple//DTD PLIST 1.0//EN" "https://www.apple.com/DTDs/PropertyList-1.0.dtd">
<plist version="1.0">
<dict>
<key>AppSecret</key>
<string>--appcenter key--</string>
</dict>
</plist>
|
/ios/<app-name>/AppDelegate.m 파일에 아래 소스를 추가한다.
1
2
3
4
5
6
7
8
9
10
11
12
13
| #import <CodePush/CodePush.h>
#import <AppCenterReactNative.h>
#import <AppCenterReactNativeAnalytics.h>
#import <AppCenterReactNativeCrashes.h>
- (NSURL *)sourceURLForBridge:(RCTBridge *)bridge
{
#if DEBUG
return [[RCTBundleURLProvider sharedSettings] jsBundleURLForBundleRoot:@"index" fallbackResource:nil];
#else
return [CodePush bundleURL];
#endif
}
|
/ios/<app-name>/info.plist CodePushDeploymentKey에 CodePush에서 받은 Staging Deployment Key을 입력한다.
1
2
| <key>CodePushDeploymentKey</key>
<string>--Staging Deployment Key--</string>
|
cd ios && pod install && cd ..
android 설정
1
| npm install appcenter appcenter-analytics appcenter-crashes --save-exact
|
android/app/src/main/assets/appcenter-config.json
1
2
3
| {
"app_secret": "<app_secret_value>"
}
|
android/settings.gradle 파일에 아래 소스를 추가한다.
1
2
| include ':app', ':react-native-code-push'
project(':react-native-code-push').projectDir = new File(rootProject.projectDir, '../node_modules/react-native-code-push/android/app')
|
android/app/build.gradle 파일 가장 아래에 아래 소스를 추가한다. (Cannot add task ‘bundleDebugJsAndAssets’ as a task with that name already exists. 에러가 발생하면 이미 같은 작업의 이름이 있다는 것. 파일을 확인한 후 중복되어 있는 (예: apply from: “../../node_modules/react-native/react.gradle”) 부분을 제거한다.
1
2
| apply from: "../../node_modules/react-native/react.gradle"
apply from: "../../node_modules/react-native-code-push/android/codepush.gradle"
|
android/app/src/main/java/<app-name>/MainApplication.java ReactNativeHost 설정에 getJSBundleFile() 추가한다.
1
2
3
4
5
6
| import com.microsoft.codepush.react.CodePush;
@Override
protected String getJSBundleFile() {
return CodePush.getJSBundleFile();
}
|
android/app/src/main/res/values/strings.xml 파일에 CodePushDeploymentKey를 추가한다.
1
2
3
4
| <resources>
<string name="app_name">fetching-android</string>
<string moduleConfig="true" name="CodePushDeploymentKey">--Staging Deployment Key--</string>
</resources>
|
1
2
3
4
5
6
7
8
9
10
11
12
13
14
15
16
17
18
19
20
21
22
23
24
25
26
27
28
| android {
...
buildTypes {
debug {
...
// Note: CodePush updates should not be tested in Debug mode as they are overriden by the RN packager. However, because CodePush checks for updates in all modes, we must supply a key.
resValue "string", "CodePushDeploymentKey", '""'
...
}
releaseStaging {
...
resValue "string", "CodePushDeploymentKey", '"<INSERT_STAGING_KEY>"'
// Note: It is a good idea to provide matchingFallbacks for the new buildType you create to prevent build issues
// Add the following line if not already there
matchingFallbacks = ['release']
...
}
release {
...
resValue "string", "CodePushDeploymentKey", '"<INSERT_PRODUCTION_KEY>"'
...
}
}
...
}
|
code-push 업데이트
1
| code-push release-react <appName> <platform> -d Staging [or Production]
|
1
| appcenter codepush release-react -a <project.co.kr>/<projectname-android> -d Staging [or Production]
|
1
| appcenter codepush release-react -a <project.co.kr>/<projectname-ios> -d Staging [or Production]
|
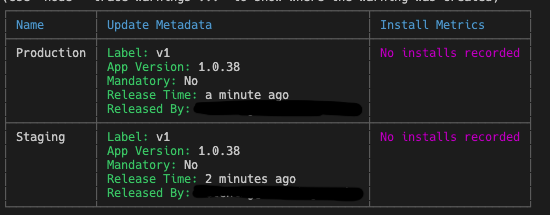
Production으로 배포할 경우 실 배포 앱에 적용된다.
![]()
![]()
이렇게 배포가 성공했는데 실 배포 앱에 적용되지 않는다면 배포된 파일의 appcenter key 와 staging key와 현재 적용하고 있는 파일의 appcenter key 와 staging key가 일치하는지 확인해 봐야 한다.